...As Jim Morrison once sang. And as did I on Saturday night emceeing at Caburlesque Weird and Quirky. I had very little time to get costumed and made up so I went for a simple look; matching my makeup to the faces on my costume. As you do.
Here I am at the curtain call, with Douglas Sievers-Jarrett and La Femme Fantail.
So why such a fast turnaround? Because until 5pm, I was emceeing a wedding in the country!
My daytime look, pinup inspired. Wearing the black lace dress with red rose appliques.
It was a glorious wedding, incorporating Druid, Christian and legal ceremonial elements. Emily the bride declared that she and Richard got "All kinds of married" and that was a great way of putting it!
I know I've been quiet these past few weeks, but of course that's because I've been so busy. I am working on a costume, making those kale edged organza frills for the bottom. Negotiating with the supplier of our bias bindings to make a super narrow satin one for the edges of this. It's going to be such a pain in the pattoottie to attach but it will be worth it I feel.
I have until 10 October to get all the details for our Fringe Festival show locked down so that is my priority. Wish me luck!
Showing posts with label Friends. Show all posts
Tuesday, October 4, 2016
Thursday, December 3, 2015
If there's no photos it didn't happen
Curse the internet unwritten rules about photos! I simply either have a life, or I have a camera. I cannot seem to have both at once.
Here's me, as Constance, at a gig in Christchurch last Saturday, 28 November. Like good detectives, let us work from this evidence to put together a story of times and fun.
1. Also in the photo are, from left, Ross, Terry and Aunty Christine. She is not our Aunty, but that's fine. She's Sophie's and that's all you need to know. Ross is wearing a waistcoat covered in silk applique sunflowers I made him over 20 years ago. Terry is wearing a shirt I made him about a year ago. T and R actually live in Wellington but got it into their heads to come to a show in Chch instead, and bring Aunty Christine.
2. So, how did I end up in Chrstchurch on the evening of the 28th November? Wearing the red sequinned costume with fluffy feather boa all around the edge? It all started at 12.45 at a Christmas lunch, with my darling quilters at Capital Quilters. I hung out, entertained them with some songs, then drove back home. 20 minutes to finish packing and off to the airport, complete with sequins and feathers! No time to change and anyway no room in my suitcase!
3. On the plane, sat beside a lovely man from Merivale, applying all my charms to him so he relaxes and copes with sitting beside all of that! I rewarded him by plastering his neat black slacks with cream feathers. He took a photo of me in my plane seat because we reckoned his wife would never believe him!
My gorgeous friend Jacinta picked me up and dropped me at the venue. Years of living in Christchurch meant a bed for the night and lots of mates to come to the show was the easy bit! The evening comprised two shows, the first emceed by a local comedian Dan Bain. I hung out backstage and got bio info off the performers. And when it turned out they were a performer down, I went out and sang! As you do!
My show went fine - so lovely that so many Christchurch friends came - many of whom had never been to a burlesque show and never would have otherwise. All had a laugh so that's what counts.
Jacinta and I got to bed about 2am after peanut butter sandwiches and tea - I had eaten nearly nothing all day. We made up for it at a yummy brunch with Adele and Wendy on Sunday. The four of us were the Musketeerettes of Christchurch 10 years ago! So nice to hang out again.
All this fun led to me getting to the airport a teeny bit late for checking in my suitcase, so it went off to be sent on later, it turns out.
And when I finally got in my front door with MrC the gorgeous hunk, it was after 4pm and the house smelled of roasting turkey. By 6pm we had a crowd of mostly American friends, all bearing delicious dishes, for a slap up Thanksgiving feast.
Thanksgiving as I've said every year, is not a Kiwi thing. But I love the idea of having a holiday just to give thanks. I have so much to give thanks for - and this past amazing weekend is only one of my many blessings.
Much love,
MrsC xo
PS. Do you like my head piece? Santa poking out of the my chimney on a little tiled roof!
Labels:
Burlesque,
Constance Craving,
Friends,
Thanksgiving
Sunday, June 28, 2015
A past project uncovered.
You know you've been sewing a looong time when rediscovering evidence of early projects feels a bit "archaeological".
On Saturday morning, I was going through the Menswear Pattern Library* shirt patterns to source enough shirt front and pocket patterns to teach pattern matching. This is in my Mad Skills class where we just blast through about ten techniques in samples. Much to my surprise and delight, I found this:
This is the very first men's shirt pattern I ever used, to make three shirts for my friend Ian at church. It was 1980 and I was 15. How I know it was this pattern is the tracings on the pocket piece. The fabric was a leopard print jersey with very little stretch (thank goodness). The other two were white and midnight blue satin.
Oh the folly of youth, to take on making shirts out of knits and satins!
Anyway, the tracing was my first attempt to match a pattern for a pocket, and it was quite apt, given I was about to teach the technique that evolved from this attempt. (It was successful, but these days we save the pocket piece from being scribbled on)
But wait, there's more. I sent the photo above to Ian and he told me he still had the shirt! His lovely wife Shirley unearthed it and sent me this photo:
*My shop has a collection of menswear patterns, many of them vintage, that anyone can borrow for a gold coin donation ($1-$2) which we then spend on more patterns. We do this as there are much fewer options for menswear patterns even with Thread Theory's excellent work in that area. Plus, I love the cut of many of the 1960s-1970s patterns; they are cut for a slim fit and many of our customers and students prefer this shape.
On Saturday morning, I was going through the Menswear Pattern Library* shirt patterns to source enough shirt front and pocket patterns to teach pattern matching. This is in my Mad Skills class where we just blast through about ten techniques in samples. Much to my surprise and delight, I found this:
This is the very first men's shirt pattern I ever used, to make three shirts for my friend Ian at church. It was 1980 and I was 15. How I know it was this pattern is the tracings on the pocket piece. The fabric was a leopard print jersey with very little stretch (thank goodness). The other two were white and midnight blue satin.
Oh the folly of youth, to take on making shirts out of knits and satins!
Anyway, the tracing was my first attempt to match a pattern for a pocket, and it was quite apt, given I was about to teach the technique that evolved from this attempt. (It was successful, but these days we save the pocket piece from being scribbled on)
But wait, there's more. I sent the photo above to Ian and he told me he still had the shirt! His lovely wife Shirley unearthed it and sent me this photo:
Great pattern matching eh, not bad for 15.
Ian was, is, pretty zany and fun, and this shirt suited him, both in colouring and in personality. Of course it's quite tame compared to the shirts I make for MrC, but 35 years ago it was pretty different!
Tuesday, May 19, 2015
"Do You Have a Licence for that Monkey?"
Inspector Clouseau may never have uttered that exact phrase, but it was in my head when I found this fabric at Emporos in Greytown, and as I made this lampshade last Saturday.
My bestie Ross brought this floor stand and shade to me recently with a casual, "See if you can do something with this" that only friends of 35 years plus can pull off.
Knowing what an amazing house they have and what a penchant for the exotic they have, I went with Mr Monkey.
My bestie Ross brought this floor stand and shade to me recently with a casual, "See if you can do something with this" that only friends of 35 years plus can pull off.
Knowing what an amazing house they have and what a penchant for the exotic they have, I went with Mr Monkey.
My naughty monkey in his flamboyant Aladdin's costume. I LOVE this fabric!!!
I didn't take a before shot of the shade, but it was right at home with these boring beige beasties
A full length body shot.
Close up and Personal
One of the other Monkeys and the trims - a beaded one sewn to a braided one - I only bought two metres of it but the wonderful Zara from Off Grid Chic got me an extra metre as the shop is near her place of work. :) Yes I have a shop full of trims and a stash full of trims. But blue? Not one inch of blue did I own!
Same trim with the edge trimmed flat.
I was so lazy but it worked - I reused the original lining. It was in good nick and of course, fit perfectly!
Sunday, November 30, 2014
Thanksgiving Kiwi Style
As Thanksgiving isn't a holiday here, we always celebrate it on the Sunday after. This year we had 16 people including ourselves, all of them either originating from America (11) or espoused to an American (2), or us, (2) or Conrad, who we have all decided is an honorary American.
Shell took this photo and there is something a little Julia Child about it, I feel - the colours and all the food in big flat dishes, it just reminds me of those 1960s cook books. With the happy chef. I am not sure what Paul is doing in the background, possibly making the MOST DELICIOUS Caesar Salad EVER.
This year, noone volunteered to make pumpkin pie, so I gave it a go. I've never been a fan, as I dislike nutmeg and clove in food (I love the smells though) and it's all I ever taste. So, I made it my way.
I used Chelsea Winter's Pumpkin pie recipe as I wanted a recipe that spoke Kiwi. Adaptations I made were:
Anyway, we had a lovely, relaxing afternoon, enjoying each others' dishes (I do the turkey, gravy and the pies, everything else is contributed).
How did your Thanksgiving go, if you celebrate it?
Shell took this photo and there is something a little Julia Child about it, I feel - the colours and all the food in big flat dishes, it just reminds me of those 1960s cook books. With the happy chef. I am not sure what Paul is doing in the background, possibly making the MOST DELICIOUS Caesar Salad EVER.
This year, noone volunteered to make pumpkin pie, so I gave it a go. I've never been a fan, as I dislike nutmeg and clove in food (I love the smells though) and it's all I ever taste. So, I made it my way.
I used Chelsea Winter's Pumpkin pie recipe as I wanted a recipe that spoke Kiwi. Adaptations I made were:
- I subbed out the 1/2 cup each of white and brown sugar for 3/4 cup of coconut sugar
- I had already cooked the pumpkin before hunting down a recipe so I just put it into the cream and reheated it.
- The spices I used were one teaspoon each of mixed spice, cinnamon and ginger
- I sprinkled a fine but even coating of coconut sugar over the top instead of the topping she uses, which sounds amazing but MrC doesn't like coconut (coconut sugar has no coconut taste, it's just tasty and not as sweet as cane sugar)
Anyway, we had a lovely, relaxing afternoon, enjoying each others' dishes (I do the turkey, gravy and the pies, everything else is contributed).
How did your Thanksgiving go, if you celebrate it?
Saturday, July 26, 2014
Born Before '74, We Did It!
It was short, sweet and fun. Here are some photos:
Gold for starters...
Michael and Emma singing at the piano.
Me and MrC - another singer friend was meant to be in the show but when he couldn't do it. MrC stepped in. It was fun pretending to be married to my own husband!
MrC and Jan Bolwell from Crows Feet Dance Collective getting their dance on. MrC was sitting in the front row when she went to grab someone from the audience, and he is always up for a laugh :)
Me in the WTF coat.
Miss Moxie Fizz - every other photo I have of her act gives away the whole punchline of a truly hilarious act!
Labels:
Cabaret,
Constance Craving,
costuming,
Friends
Wednesday, September 18, 2013
A weekend away
Things have been quiet at The iRon but busy on the home and work front. A not uncommon dynamic for bloggers, I imagine.
Last week I had some kind of virus that really knocked me over - self-employed people know that you go into work unless you are unconscious or have lost limbs, but I couldn't. DVDs and the couch were my lot for two days. On Friday, I made the OMG dress - a first Holy Communion dress for a beloved poppet. Named OMG because as her Mamma and I looked for inspiration dresses on teh interwebs, we went OMG! at one picture, and it was the basis for it.
Actually now I look at the photo, it ended up quite different. Ours had half circle tulle with no gathering at the waist, sleeves and a very different proportion. But it did have the princess seams, flowers and overall OMG ness.
Apart from the tulle, all the fabric was from a stash of wedding dress offcuts gifted to me, so it was a beautiful quality delustred satin. Waist flowers from shop stock, skirt flowers cut from Guipure lace scraps from the offcut stash. Photos will appear perhaps at some stage. In the meantime it is good for your imagination.
Then after finalising the dress, on Saturday morning MrC and I headed off to our favourite bolt hole, Martinborough. This trip was very different from most, however. We went to one vineyard only, Poppies, and we had a platter (NOMNOM!) in the sun on the lawn, with a glass of delicious rose. No bottle of wine bought AT ALL.
We visited Sue at JayahwithSoul, a gorgeous clothing store on the main st, who is one of those bubbly and dynamic women who you just fall in love with on first meeting. Between our June trip and this one, I made four shirts for her husband Mike, as a surprise for his 50th:
So you see, Sue has Influence Over Me now. Sewing for one's own husband is one thing. Sewing for Others' Husbands is something else again. But it was all in the interests of experimentation.
We had drinks at Cool Change with Mike and Sue and some of their other friends:
Last week I had some kind of virus that really knocked me over - self-employed people know that you go into work unless you are unconscious or have lost limbs, but I couldn't. DVDs and the couch were my lot for two days. On Friday, I made the OMG dress - a first Holy Communion dress for a beloved poppet. Named OMG because as her Mamma and I looked for inspiration dresses on teh interwebs, we went OMG! at one picture, and it was the basis for it.
Actually now I look at the photo, it ended up quite different. Ours had half circle tulle with no gathering at the waist, sleeves and a very different proportion. But it did have the princess seams, flowers and overall OMG ness.
Apart from the tulle, all the fabric was from a stash of wedding dress offcuts gifted to me, so it was a beautiful quality delustred satin. Waist flowers from shop stock, skirt flowers cut from Guipure lace scraps from the offcut stash. Photos will appear perhaps at some stage. In the meantime it is good for your imagination.
Then after finalising the dress, on Saturday morning MrC and I headed off to our favourite bolt hole, Martinborough. This trip was very different from most, however. We went to one vineyard only, Poppies, and we had a platter (NOMNOM!) in the sun on the lawn, with a glass of delicious rose. No bottle of wine bought AT ALL.
We visited Sue at JayahwithSoul, a gorgeous clothing store on the main st, who is one of those bubbly and dynamic women who you just fall in love with on first meeting. Between our June trip and this one, I made four shirts for her husband Mike, as a surprise for his 50th:
Mike in his favourite, from the same Edgar Allen Poe inspired range as David's Nevermore. Purple contrasts.
Mike's least favourite, and Sue and I were both a bit unsure about it, but Mike's mate is a hot rodder and loves it so he is now the new owner of it. Win win. The one he was wearing when we saw them on the weekend is my favourite - a William Morris inspired print in browns and blues. BTW, making four shirts including drafting the pattern for them etc on top of work has also been keeping me away from posting.So you see, Sue has Influence Over Me now. Sewing for one's own husband is one thing. Sewing for Others' Husbands is something else again. But it was all in the interests of experimentation.
We had drinks at Cool Change with Mike and Sue and some of their other friends:
Cool Change Bar and Restaurant in Martinborough, I loves it! This is not us though, it is Spring not Summer!
Then we toddled off to the local boutique picture theatre to see Red 2. Hilarious! Even MrC stayed awake throughout. Given how knackered he was, this is some achievement.
One early night later, we had breakfast at Pinocchio's, another gorgeous cafe, checked out some real estate (yes, I am THAT smitten with the place) and finally headed homewards. Him to a nap and washing, me to the after match function for the poppet's 1st Holy Communion. That child is a wonder. After several hours of playing including a lunch that involved both beetroot and chocolate, her dress was still pristine white.
DIY pizzas with other friends at home, and then we were both ready to sleep for three years.
So yes, it has been an unusually busy time lately, but lots of fun too. :)
Monday, November 26, 2012
Talking Turkey
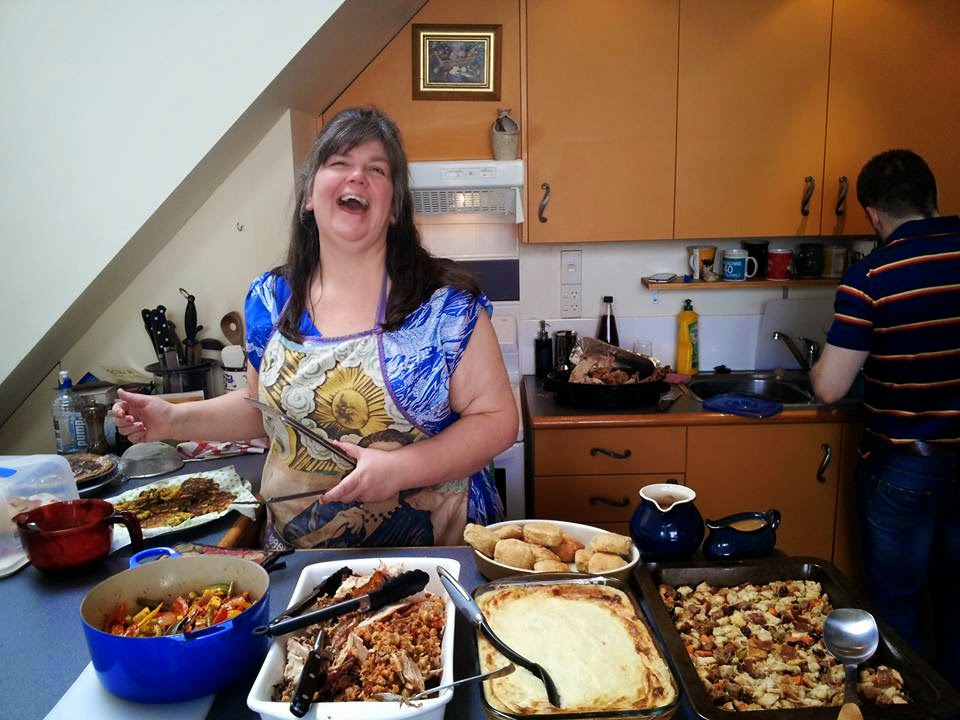
On Sunday evening we had our American friends over for a pot luck Thanksgiving dinner. All I do is the turkey, everything else arrives from a range of traditions covering the US from West Coast to East.
Anyway, everyone was very enthusiastic about the turkey, and I realised that every time I cook turkey, it is always well received. Apparently this business of cooking a turkey so it is moist and tasty is quite elusive, but mine are always like that. So I figure I owe it to the world to explain what I do, in case it adds to the collected wisdom in some small way.
You need:
A Turkey (free range preferably)In this case, a size 4 (smallest I could find, still enormous!)
Streaky bacon made from happy pigs, about 250g
Stuffing
500ml chicken stock
Flour
Seasonings
Make sure the turkey is completely defrosted if frozen. I bought mine on Tuesday and it was only just defrosted in the fridge by Sunday! Remove the neck and other bits from the cavity. Give it a rinse out and a good drain before putting in a roasting pan. Ease your hand into the space between the skin and the meat, between the leg and breast. Gently lift the skin away from the meat, and start stuffing the....er...stuffing into it. And the cavity. Give the outside a good grind of pepper.
Now, arrange the streaky bacon in a herring bone over the whole bird. You know, on an angle alternating one side then the other, until the turkey is covered.
Cover the whole thing in foil, tucking it around it but not too tight because you're going to have to remove it a few times.
Put in an oven heated to 200 C, turn it down to 160 C and cook for about 3 hours, basting about once an hour. Take the foil off, transfer the turkey to another ovenproof dish and cook for another 15 minutes to brown. (I have a fan bake oven and I suspect without it, it would take longer) I think I need to say that one year, I put the turkey in the oven at 4.30am on 120C, same prep, and when Icame around woke up at 10am, it was perfectly cooked. So, I don't think the cooking time is a factor - but length of time and temperature combined is.
To make the gravy, during the cooking time I sauteed the neck and giblets in a pot, added the chicken stock and the tops of the spring onions. Simmer for about an hour, covered, then drain. Discard the solids.
Put the oven dish on the stove top and turn any elements it covers to a low setting. Sprinkle about 1/4 cup flour over the tray, give it a good stir and scrape, then add the hot stock. Keep stirring until it is smooth and thickens up. Add the juice of the half an orange, and some pepper. I also added a dash of Worcestershire sauce. Finally, I sieved it to get any bits out but really, the bits are rather nice!
Now, that stuffing. It needs to be moist and tasty too. This is the one I did on Sunday:
6-8 thick slices of wholemeal bread, ripped into small chunks
about 250g chorizo, chopped
2 bunches spring onions, chopped up.
200g mushrooms, chopped up
a big handful of parsley, finely chopped
grated rind of an orange, juice of remaining half
about a cup of roasted cashews, roughly chopped
a sprinkle of drained capers
Lots of butter (sorry!)
This is all the wrong way around, as you make the stuffing first, so I used the same pot I went on to make the gravy in. Melt about 50g butter, and saute the chorizo. Add chorizo and the butter to the bread in a big bowl. Add another 50g butter and saute the onions, then add them. Do the same with the mushrooms. Add the other ingredients to the bowl, add a big grind of pepper, and using your hands, get in there and mix it all together thoroughly. Add a slosh of the chicken stock to it too.
Since you're all covered in it, get stuffing straight away. :)
I also do a stuffing using rice, for the gluten free bods in my life.
So why does this work? I am not sure. I figure the bacon is an essential part of the flavour and moistness containment. And putting lots of moist stuffing in under the skin, not just in the cavity too. And the foil.
So, happy turkey cooking, when the moment comes in...eep, 28 sleeps? Something like that!!
Anyway, everyone was very enthusiastic about the turkey, and I realised that every time I cook turkey, it is always well received. Apparently this business of cooking a turkey so it is moist and tasty is quite elusive, but mine are always like that. So I figure I owe it to the world to explain what I do, in case it adds to the collected wisdom in some small way.
You need:
A Turkey (free range preferably)In this case, a size 4 (smallest I could find, still enormous!)
Streaky bacon made from happy pigs, about 250g
Stuffing
500ml chicken stock
Flour
Seasonings
Make sure the turkey is completely defrosted if frozen. I bought mine on Tuesday and it was only just defrosted in the fridge by Sunday! Remove the neck and other bits from the cavity. Give it a rinse out and a good drain before putting in a roasting pan. Ease your hand into the space between the skin and the meat, between the leg and breast. Gently lift the skin away from the meat, and start stuffing the....er...stuffing into it. And the cavity. Give the outside a good grind of pepper.
Now, arrange the streaky bacon in a herring bone over the whole bird. You know, on an angle alternating one side then the other, until the turkey is covered.
Cover the whole thing in foil, tucking it around it but not too tight because you're going to have to remove it a few times.
Put in an oven heated to 200 C, turn it down to 160 C and cook for about 3 hours, basting about once an hour. Take the foil off, transfer the turkey to another ovenproof dish and cook for another 15 minutes to brown. (I have a fan bake oven and I suspect without it, it would take longer) I think I need to say that one year, I put the turkey in the oven at 4.30am on 120C, same prep, and when I
To make the gravy, during the cooking time I sauteed the neck and giblets in a pot, added the chicken stock and the tops of the spring onions. Simmer for about an hour, covered, then drain. Discard the solids.
Put the oven dish on the stove top and turn any elements it covers to a low setting. Sprinkle about 1/4 cup flour over the tray, give it a good stir and scrape, then add the hot stock. Keep stirring until it is smooth and thickens up. Add the juice of the half an orange, and some pepper. I also added a dash of Worcestershire sauce. Finally, I sieved it to get any bits out but really, the bits are rather nice!
Now, that stuffing. It needs to be moist and tasty too. This is the one I did on Sunday:
6-8 thick slices of wholemeal bread, ripped into small chunks
about 250g chorizo, chopped
2 bunches spring onions, chopped up.
200g mushrooms, chopped up
a big handful of parsley, finely chopped
grated rind of an orange, juice of remaining half
about a cup of roasted cashews, roughly chopped
a sprinkle of drained capers
Lots of butter (sorry!)
This is all the wrong way around, as you make the stuffing first, so I used the same pot I went on to make the gravy in. Melt about 50g butter, and saute the chorizo. Add chorizo and the butter to the bread in a big bowl. Add another 50g butter and saute the onions, then add them. Do the same with the mushrooms. Add the other ingredients to the bowl, add a big grind of pepper, and using your hands, get in there and mix it all together thoroughly. Add a slosh of the chicken stock to it too.
Since you're all covered in it, get stuffing straight away. :)
I also do a stuffing using rice, for the gluten free bods in my life.
So why does this work? I am not sure. I figure the bacon is an essential part of the flavour and moistness containment. And putting lots of moist stuffing in under the skin, not just in the cavity too. And the foil.
So, happy turkey cooking, when the moment comes in...eep, 28 sleeps? Something like that!!
Saturday, February 18, 2012
Our Big Fat Gypsy Wedding Party!
Have you had this TV programme on air lately? The various series and versions aired last year in NZ, and caused quite a flutter among some of my friends. In the end, we just had to channel our inner travellers, and on Saturday 18 Feb 8pn at Thistle Hall, the dearly beloved gathered for our very own Big Fat Gypsy Wedding Party!
Me and MrC, or Paddy for the night. Dig his jacket? It's a woman's jacket, tailor made, from the late '80s. We worked out that in gypsy years, we were great grandparents! (note: he is kissing my hand, that's all...) One of the brides present, with her bridesmaids. No fake tan was spared in the making of most outfits!
Rob as an Irish traveller. Loving the mullet wig!
The amazingly talented and clever Jim Stanton demonstrating the swirl factor in her outrageous costume!
We had an amazing night, so many awesome costumes! I read palms all night (the fishbowl turned out to be unreliable) and had to deal with quite a cue! There was lots of Shakira-esque moves on the dance floor and lots of sequins and battery operated personal fairy lights.
Thanks Maz and M. David for thinking of it and making it happen :)
Me dressed as Mystic Meg, complete with TWO Bumpits! Those things are like Viagra for the hair, very impressive!
Mystic Meg with her crystal ball (or, small fishbowl recently emptied of crisps, stuffed with supermarket plastic bag, er)Me and MrC, or Paddy for the night. Dig his jacket? It's a woman's jacket, tailor made, from the late '80s. We worked out that in gypsy years, we were great grandparents! (note: he is kissing my hand, that's all...) One of the brides present, with her bridesmaids. No fake tan was spared in the making of most outfits!
Rob as an Irish traveller. Loving the mullet wig!
The amazingly talented and clever Jim Stanton demonstrating the swirl factor in her outrageous costume!
We had an amazing night, so many awesome costumes! I read palms all night (the fishbowl turned out to be unreliable) and had to deal with quite a cue! There was lots of Shakira-esque moves on the dance floor and lots of sequins and battery operated personal fairy lights.
Thanks Maz and M. David for thinking of it and making it happen :)
Friday, February 3, 2012
Sew Grateful for...
This coming week has been declared Sew Grateful week. The declarer is the inspiring Debi from My Happy Sewing Place. I absolutely love the idea and am thinking of ways to best participate.
But before that, I wanted to ponder a bit on the question of what there is to be sew grateful for.
Friends: Sewing is about friends. Sewing together, helping each other out - the friendly and easy camaraderie of working together on the same or different projects, keeping our hands busy and our minds free, is such a satisfying source of contentment. Sewing for friends is also a pleasure, as I have way more ideas in my head of things I want to make than I have wardrobe space or figure shape to satisfy. :)
Self-expression: Sewing is a practical skill but it is also highly creative. A famous jeweller was saying on the radio today how jewellery was the first art form that allowed people to express their wealth, status and style. Got news for him - before the jewellery came the clothes onto which it is fastened! Within the limitations of skill. available materials and tools, we can make anything we want, express ourselves and our sense of style any way we like - unfettered by what the High St stores have on offer.
Also in our homes - my home is a tribute to MrC's and my love of cosy opulence, and mostly because I can make 30m of fabric into enormous drapes at a fraction of the cost of having them made, likewise giant cushions, tablecloths, lampshades - all those lovely patterned soft surfaces that make a home so homely. :)
Creative outlet: Because I quilt and also love to make things like tea cosies, I am forever having to find homes for them! And that means taking an interest in what other people like, as well as what I like. If I were left to my own devices, everything would be red, red, red, with maybe a touch of gold. But the desire to strew my output across the landscape means I also get to make blue things, green things, black and cream things - moments of stepping out of my red and gold box and enjoying putting other colours and patterns together. It is very liberating!
So yes, I am incredibly grateful for the skills that I have built up over 40 years of sewing, without them I wouldn't be me! :)
What are you sew grateful for?
Tuesday, January 17, 2012
On opening nights and the miracle of friendship...
We did it! Lonely heart 'went up' last night! It all went as smoothly as it could, and it was very well received. And it got a fantastic review from Wellington's toughest theatre critic!
Just waiting on photos before posting a lot more.
In the meantime I want to say a few things about friends. If EVER a woman was blessed with amazing friends, it is I.
Leimomi, The Dreamstress, contributed not only her time and skill in making the most beautiful 1940's wedding dress out of polyester damask tablecoth fabric of all things, but also her wisdom and knowledge of 1940's fashion and finishes. Without her counsel to bounce things off I would have felt very alone. AND her copy of Everyday Fashions of the 1940's was invaluable!
Madame Ornata, who made aprons, came over and sewed, unpicked, made me cups of tea and made me laugh. What a woman!
Emma Kinane, who is in this show, but also found lots of time to sit and sew with me, and regale me with fascinating tales of her life. What a woman!
Eileen, The Duchess of Texas, brought me dinner from my favourite Italian restaurant, and even coffee, kept me company and threaded pearls. How cool is that! I thought I was going to get a sandwich!
My sister Jo, My mum Jenny the Embroidenator, and my stepdaughter Amelia all gave up some of their holiday to sew costumey bits, make encouraging noises and put up with me!
Claire from The Vanity Case, whose skill with vintage looks, absolute humour and patience with our cast and recalcitrant wigs alike has put a big cherry on the top of the whole look we would never have achieved without her.
And of course, MrC, David. What a guy! He is SO patient -he has learnt about bias binding, zips and all manner of haberdashery he was sent out to source for me with very little guidance, and always with success. He has fed me, looked after me and put up with me, and supported me in this as in everything in our life.
I am truly Blessed!! Thank you all, and all of the wonderful people in my life, for being who you are.
Sunday, January 15, 2012
Lonely Heart - Martha's Hats
No 1949-1950 setting is complete without hats. Wearing hats, for both men and women, is one of the things that distinguishes the earlier 20th C from the last few decades. If we leave them out of this show then most people would not notice, but they may have a sense of it being "not quite put together" and unfinished.
Ray has a grey fedora that he is rarely going to wear as most shots are interior, but having one in his hands is an important anchor. I just hope that Nick has been rehearsing with it.
Martha has two hats, both made my moi, partly because it is really hard to find hats that old, but also because I love making hats and they don't take all that long to do.
Hat 1: Navy heart shaped hat. This shape was really popular around the time of our play. Whether the brim was heart shaped or round, the effect of a halo rising behind the head was very popular. The crown is made from a commercial hat shape given to me, the brim out of buckram. Whole thing covered in cotton jersey knit (so easy to shape and its dull, thickish texture is reminiscent of felt) and the method an adaptation of my wide brim hat tutorial. The bow is from a scrap of shower curtain nylon I bought at the opshop for 20 cents, as I have no blue in my stash! Trimmed with ivory satin and navy cotton commercial bias bindings.
Hat 2: Red leaf hat. This cloche style hat hugs the back of the head and I love it. I made the base from buckram - cutting a big leaf shape, snipping the long edges and stitching little overlaps all the way around to give it shape. I then covered the outer side with thin cotton quilting batting to soften the shaping lines, then shaped the ruched, bias cut fabric over it. Sew around the edge, trim and sew bias around it to finish it off. The three loops are straight cut fabric with stiff net inside so as to keep their shape.
Small error - the ruching should fan upwards, not downward, but I realised I liked the loops better along the topline not the bottom so it is actually upside down. Such is millinery experimentation.
Thankyou Madame Ornata for modelling. Madame O has been such a great help with this show - coming over for hours to unpick, resew, make me laugh, try things on, make cups of tea, you name it!
Update: it's dress rehearsal this evening which is why it's taken me a few days to get this post completed. And the things I have to tell you about...I don't have time to tell you about! I will very soon, however... :)
Tuesday, November 8, 2011
#Twelve...
What do the first eleven Doctors have in common? Apart from being interesting, smart, eccentric, clever, intrepid and English? They are all BLOKES.
Wouldn't it be nice if #12 was a woman. And not a skinny, pouty, collagen lipped Plastic, please. A real woman. Miriam Margoles, Zoe Wanamaker, Miranda Hart? That would be funny!
A few months ago, a few of us went out to take photos of The Dreamstress' creations; of Aline's dress and the Pink extravaganza, under the amazing lens of "Diane Villiers," aka Sarah. Usually I stick to hair and makeup but Madame O convinced me not to be such a sap and get dressed up too.
Wanting to show off my purple frock coat and my new top hat and goggles, I thought I'd have a go at creating a lady Doctor.
Sonic fan maybe? Screwdrivers are Soooo 28thC!
Nothing says "spin!" like a frock coat!
The all important reveal shot of all those Hong Kong bound seams. A huge job but I love the effect. And so nice to use a beautiful cotton print from my stash.
On the lookout for alien space ships maybe?
To the Tardis!! Purple frock coat made from heavy cotton knit (rugby knit?) machine appliqued with ribbon rose fabric.
Meh, life in Space is tough. Sometimes a girl just wants to hang out with her pals and a parasol.
A lovely afternoon was had by all!
Monday, October 17, 2011
Teacosy giveaway :)
Well, remember how Adele won the teacosy in my giveaway a few weeks back? Well, here it is. I had enough Horrid's (you know who I mean - Knightsbridge, posh etc) teatowel left to make a pair of potmits:
I couldn't resist these teatowels and bought a few. Adele LOVES teatowels, and so it seemed like the perfect material to use.
But when you are 4, like Angus, a teacosy means one thing only! It even comes with shields! ;-)
Labels:
Cosies,
Crafts in general,
Friends,
Giveaways,
Pogey bait,
Upcycling
Saturday, September 3, 2011
Impressionist impressions...
Yesterday we had an afternoon tea for Madame Ornata's birthday. I took a couple of photos as in my mind's eye my beautiful friends kept arranging themselves as if Renoir was about to pop out and paint them. Wonderful.
I tried in Photoshop to capture the impressionist view - it got a bit pop arty but I still think it is fun:
The Birthday girl in peony silk polonaise, Elisabeth in strapless boho and Sarah looking very, very Renoir with some Toulouse-Lautrec thrown in for good measure! It was a beautiful, fun day. Happy birthday Madame O! xoxo
Sunday, June 19, 2011
Making a full petticoat the EASY way - tutorial
Darling bloggettes, I just farewelled my lovely friends Joy and Madame O who have been at mine this afternoon. Joy and I making her a rockabilly petticoat, while Madame O did embroidery, and tried things on. (I have a dress up rack, it is quite fun!)
Anyway, I've been trying to get Joy to make a petticoat for ages but it was daunting her something chronic; she had visions of being buried under metres of tulle frills. So, I thought, we need to find a way to do this that doesn't require pulling up gathers, quarter marking or generally, well, being buried under metres of tulle frills!
So, this is what we did. You could make it a lot fuller by repeating the whole thing and having twice as many layers. We may yet to it. We only used 3m of a kind of netting that is not tulle and not stretch net, but something fab in between. Tricot would be a good substitute,or bridal tulle.
I cut a half circle of the net, 15 inches long, with the top being 14 inches in radius. That is a circle with a total 29 inch radius. Sorry no photo but it is easy to see further on. This gives about 40 inches of waist, heaps to gather onto a foundation skirt.
Cutting 2 x 16 inch wide strips along the length of the fabric. It is not quite 3m long as the half circle skirt bit took up the end. Cut one off each side so you have a selvage on each.
Joy cutting 8 x 2 inch strips from the length.
Joy is ruching the 2 inch strips freehand. This is so easy, much easier than gathering stitches, and amazingly even. Just get started, sew an inch or so into the middle of the strip with a longish stitch. Then bunch the fabric up towards the presser foot and let it sew through. Repeat over and again until it's all done...
You get a wonderful double frill. We did this with all 8 strips, four each, just feeding the next one under the foot as the last one ran out.
Now I am sewing the ruched 2 inch strip to the edge of my 16 inch strip. No finishing of edges required, this stuff doesn't fray. When you get to the end, just cut your 2 inch frill flush with the end of the big frill. Done!
Now the observant among those present will realise that you have to do all of this twice. That is, there were two 16 inch frills. Now as we were both working on it, we did one each, but the wise woman would join her 16 inch frills together BEFORE adding the 2 inch frill to the edge etc. Just sew them together with a 1/4 or 1/2 inch seam.
Now sewing the 2 inch frill to the OTHER side of the 16 inch piece, only on the other side. This means that the other 2 inch frill is facing DOWN as I am sewing this one facing up. Capiche? It all makes sense soon. Again, trim when you get to the end. We ended up with about 6 inches left over. If you run out, just make a bit more 2 inch frill and add it. This is not an exact science! These 2 inch frills serve to really hold the bottom out.
Now, Joy is doing the same thing to this big 16 inch frill as we did to the 2 inch ones - freehand gathering it down the centre. It turned out that the edge of the machine's tray was about 8 inches from the needle so she used it as a guide. There is still no measuring going on. Woot!
The finished frill. Cute eh!
This may not be obvious from the photo but this is me sewing the big 16 inch frill down onto the bottom edge of the half circle, along the central gathering line. Do this so that the 2 inch frills both end up facing outward not inward.
I'm allowing about 1/2 inch of the half circle to overlap. No pinning, quarter marking etc. Trust the force, Luke!
And tada!! Here we have stage one complete. I hope this photo makes our 29 inch half circle with 14 inches cut out of the top of it make mroe sense...Yes, we didn't have quite enough frill to go the distance but it's no big deal. Again, the easiness of this is to not measure and pin, but to just gather the heck out of everything and treat it like a trim!
Anyway, I've been trying to get Joy to make a petticoat for ages but it was daunting her something chronic; she had visions of being buried under metres of tulle frills. So, I thought, we need to find a way to do this that doesn't require pulling up gathers, quarter marking or generally, well, being buried under metres of tulle frills!
So, this is what we did. You could make it a lot fuller by repeating the whole thing and having twice as many layers. We may yet to it. We only used 3m of a kind of netting that is not tulle and not stretch net, but something fab in between. Tricot would be a good substitute,or bridal tulle.
I cut a half circle of the net, 15 inches long, with the top being 14 inches in radius. That is a circle with a total 29 inch radius. Sorry no photo but it is easy to see further on. This gives about 40 inches of waist, heaps to gather onto a foundation skirt.
Cutting 2 x 16 inch wide strips along the length of the fabric. It is not quite 3m long as the half circle skirt bit took up the end. Cut one off each side so you have a selvage on each.
Joy cutting 8 x 2 inch strips from the length.
Joy is ruching the 2 inch strips freehand. This is so easy, much easier than gathering stitches, and amazingly even. Just get started, sew an inch or so into the middle of the strip with a longish stitch. Then bunch the fabric up towards the presser foot and let it sew through. Repeat over and again until it's all done...
You get a wonderful double frill. We did this with all 8 strips, four each, just feeding the next one under the foot as the last one ran out.
Now I am sewing the ruched 2 inch strip to the edge of my 16 inch strip. No finishing of edges required, this stuff doesn't fray. When you get to the end, just cut your 2 inch frill flush with the end of the big frill. Done!
Now the observant among those present will realise that you have to do all of this twice. That is, there were two 16 inch frills. Now as we were both working on it, we did one each, but the wise woman would join her 16 inch frills together BEFORE adding the 2 inch frill to the edge etc. Just sew them together with a 1/4 or 1/2 inch seam.
Now, Joy is doing the same thing to this big 16 inch frill as we did to the 2 inch ones - freehand gathering it down the centre. It turned out that the edge of the machine's tray was about 8 inches from the needle so she used it as a guide. There is still no measuring going on. Woot!
The finished frill. Cute eh!
This may not be obvious from the photo but this is me sewing the big 16 inch frill down onto the bottom edge of the half circle, along the central gathering line. Do this so that the 2 inch frills both end up facing outward not inward.
I'm allowing about 1/2 inch of the half circle to overlap. No pinning, quarter marking etc. Trust the force, Luke!
And tada!! Here we have stage one complete. I hope this photo makes our 29 inch half circle with 14 inches cut out of the top of it make mroe sense...Yes, we didn't have quite enough frill to go the distance but it's no big deal. Again, the easiness of this is to not measure and pin, but to just gather the heck out of everything and treat it like a trim!
We just cut the bit off at the end. Made it a bit shorter but still big enough.
Joy is marking the half circle at the 4 inch mark to add another frill. This second frill has only come about because I wanted to use up the leftover strip of fabric. I actually think that making this half circle twice and sewing them together at the top would be a near perfect petticoat. And so far, it's only taken us about 3 hours (that is, 1.5 hours with us both working on it)
This is me adding ribbon and lace to the bottom of the leftover fabric strip. I turned it up once, about a 1/4 inch, towards the front, and then I am sewing the lace and the ribbon over that turnup, together. You could sew the lace on and then the ribbon if the idea of doing both at once is a bit much. One last row of stitching along the top edge of the ribbon. It's an easy way to give something a nice, pretty and tidy edge.
We gathered up this extra frill and sewed it to the line Joy had chalked. We left the first and last couple of inches of the frill free.
To finish it, sew the half circle skirt 'back seam' right sides together, about a half inch. Make sure you don't catch the frills into it. Then on the outside, overlap the frills and topstitch them down. You could sew them together but it's not necessary. Sorry, we tried to photograph this but with all that black, it looked like nothing. Definitely vlog potential this one.
The whole netty extravaganza was sewn onto an underslip with an elastic waist. Afterwards, Joy thought it would be good to make it separate so she could wear the underslip by itself with straight skirts. I think this is a great idea. In that case, you could just turn the top over to make an elastic case. Our finished length was 23 inches. That is 15 inches of half circle skirt, an 8 inch frill, minus seam allowances, plus the extra bit of 2 inch frill to compensate for it.
Showoff!
Petticoat under a full circle skirt. she won't wear this black petticoat with the white skirt as it makes it look grey, but it gives the general idea.
Great twirling potential!
A couple of pink roses for fun
And of course, our entertaining companion for the day, Madame Ornata, demonstrating why her name suits her so well!

And of course, our entertaining companion for the day, Madame Ornata, demonstrating why her name suits her so well!
OK, so this is what I learnt, and what we will do next time (making a white one).
1. Make half circles out of cotton. Why not? :) In that case I would serge the seams and edges, or use french seams and a narrow hem, since it would fray where the net one didn't. I'd also make two of them.
2. 3m of tulle or tricot 60 inches wide, would be even better - without cutting the half circle off the end, that extra bit would mean our frill was long enough. Without the second, bonus frill I added, 48 inches was enough width so a 96 inch wide tulle would be enough for two. Or just get 6 metres. These are not expensive fabrics :)
3. For a soft tulle or tricot, I might even make two rows of 2 inch frills, lay them one on the other and gather together, for extra body. It's this body that gives the fullness at the hemline.
4. If I did it this way, I would make a waistband on the straight grain out of the cotton and attach it to the two half circles.
5. Last alternative option -Make one of the cotton half circles longer - 23 inches instead f 15, finish the bottom edge with lace and ribbon like I described above, and sew the first 16 inch frill to it 8 inches in from the bottom edge. Then make the second one like described above. Why? Because really with these petticoats you want something nice between you and the tulle. Tulle is itchy, and can rip your tights. This does mean using 54 inch wide cotton unless you have a teency waist.
This all may sound complicated, but I promise that once you actually do it, you will find out how simple it is. If you understand pi geometry and how to size a half circle, it's easy to adapt to the right size and length for you :)

Subscribe to:
Posts (Atom)


