Showing posts with label costuming. Show all posts

Sunday, May 3, 2026

Costume makeover -from Grey to Teal!


 What to do if a costume, heavily invested in time and materials, ends up being....meh? 

My 100 hour, 1kg of rhinestones and 9m of boa, Meh costume.

 Back in 2018, I bought a pile of stock from a closing down shop. This included a big bag of grey turkey feather boa. This is important as I do not care to purchase it new, as the supply chain is far from kind.

Anyway, I used it on a costume made from a purchased City Chic dress, that had about a kg of rhinestones glued to it - 100 hours of work I reckon. the dress is black with grey flowers and teal birds, and the grey boa looked lush and expensive and gorgeous. 

In my studio.

On stage, it looked like I had repurposed the fur of a deceased English Sheep Dog. I mean it looks...OK?...  in the photos but nothing like as good as it does in my studio! 

 I have worn it "as is" several times, including at the Saskatoon International Burlesque Festival (seen above), but in the back of my mind I was preparing myself to unpick all 9m of it.

This costume spent a couple of years on the proverbial naughty step before I could face it, but my current dayjobless life means all kinds of projects are finally getting finished. 

So a few weeks ago, spurred on by my burly partner in crime Debbie's instructions, I unpicked all the grey feather boas from this costume. I wet them in the sink to get a sense of how many I could fit in my 8L pot. The answer was, four. I have six, so I did two in the first batch, four in the second.

The dye was Jacquard acid dye in colour Turquoise. It cost about $18. Apart from some tartaric acid, that was it! 

These are they drying gently in the breeze outside our door. They went from looking like Cookie Monster's fur to these fluffy floofs in a couple of hours.

 There is definitely colour variation in the batches, but it isn't really noticeable as I used the two on the sleeves and the rest on the bottom. My earlier made pink and green version of this costume has pink boa in three different shades due to replacing them from different sources.

And finally, I sewed them back on, which took ages with a "doll needle" and some TV time. A doll needle is about 15cm long - I thread it up with an extra long, doubled thread, wax the thread, then it's a matter of sliding the needle inside the rolled hem for about 5cm at a time, coming up to do 2-3 overcasts that catch the centre rope of the boa. 

The final look, before and after! How did I do?

Photocredits: Left: LisaTrusler Photography Nelson, right Nicole Lorimer on her mobile from Saturday night, official pics to come! 

Sunday, November 9, 2025

Me vs AI (I think I won)

 Hi Team! It's been a couple of very busy months since I posted. I've been to Canadia, had a fantastic time there, and came home to a job. But it is high time I did the Big Reveal!

My version is proper denim blue. The tutu is made of five different nets from palest grey to navy, with a delightfully denimy shot organza  top layer and sleeves.

The magic is in a stiff crinoline horsehair tape that has gravity defying properties. I am already planning to add it to a few hemlines for extra flooff.

I made this dress to be worn with a corset. However it was so hot, and I was not feeling that great so encouraged by another performer helping me to get changed into this at the interval,  I dropped my bra straps and wore it without. The result is a less defined bust line and waist but do I care? NOPE!

AND, denim is of course cotton and very comfortable in heat,  and having it against my skin was so comfortable I wore this to the after show party and only unzipped about 3am!

It was very much appreciated by the Canadian audience and attendees of the after show party. So many people bounced up to me to tell me that denim was Canadian formalwear! They were even more excited that I already knew that and made this in their honour.  They felt seen and understood. I love that.

The AI version is technically impossible to construct, in particular the sleeves, but it was a jumping off point for my idea and I am very happy!

Other looks for the Saskatoon International Burlesque Festival:

Thursday night drag show at Free Flow Dance Centre    
Friday night first look - I snipped this from video while I am singing Royal. This costume looked so much better onstage than off! But the left sleeve keeps slipping, I will tighten the elastic.  
 
 
Old faithful for the second half of the Friday show! Belting out Dr Longjohn

 
Opening look for Saturday show  - Welcome to Burlesque. I adore this costume but I have come to the conclusion that the grey feather looks drab AF. So at some point I'll be unpicking it all, and dyeing it some kind of teal blue. Eep, big job!

And finally! Double Denim! 

And that was it for frocks! Thanks for reading.

If you want to see any of these songs on Youtube, I made a playlist including a show reel for showing what I do xo


Monday, May 20, 2024

Up to my old costuming tricks!!

 People, my new costuming tricks are all about dressing my alter ego. But my old ones were costuming for theatre shows. 

So, recently I've done a tiny bit of costuming. Basically I am a sort of shadowy resource who has tried, and sadly failed, to remain anonymous at a local community theatre. 

My contributions are generally millinery, but a couple times I've busted out something more. Here's a breakdown:

Pride and Prejudice:

This is how it all began. I got wind of a production and offered to insert headgear, as it always gets overlooked but I think it is more important than dresses for setting the scene and tone. (grr, looking at you, Bridgerton)

All of these hats are made from a range of cheap hat types - bowling fedoras, bowlers, molded plastic "top hats" you name it. I now keep a supply on hand just in case. They are useful as they have the crown to brim join already made.

Full bonnets are no good in the Gryphon theatre which has steep lighting lines so they'd cast shadows on faces. So these are all back of head types.

Lady Catherine de Burgh's extravagant tall hat. She was wearing purple and orange so I figured, get in there and lean in on the crazy! It won an award for the best showstopper of the year!

A wee ruched velvet hat, and a shallow bonnet. That was the only straw hat I could find, hence the other solutions I found to the hat making process.

I think this is my favourite. No idea what I based it on! It has a lovely pleated lining though.

Another ruched hat with turban vibes and ostrich feathers.

A little cutie based on a very cheap white top hat. Silk taffeta with organza and fake flowers. It also has a gorgeous pleated lining.

Gabriel

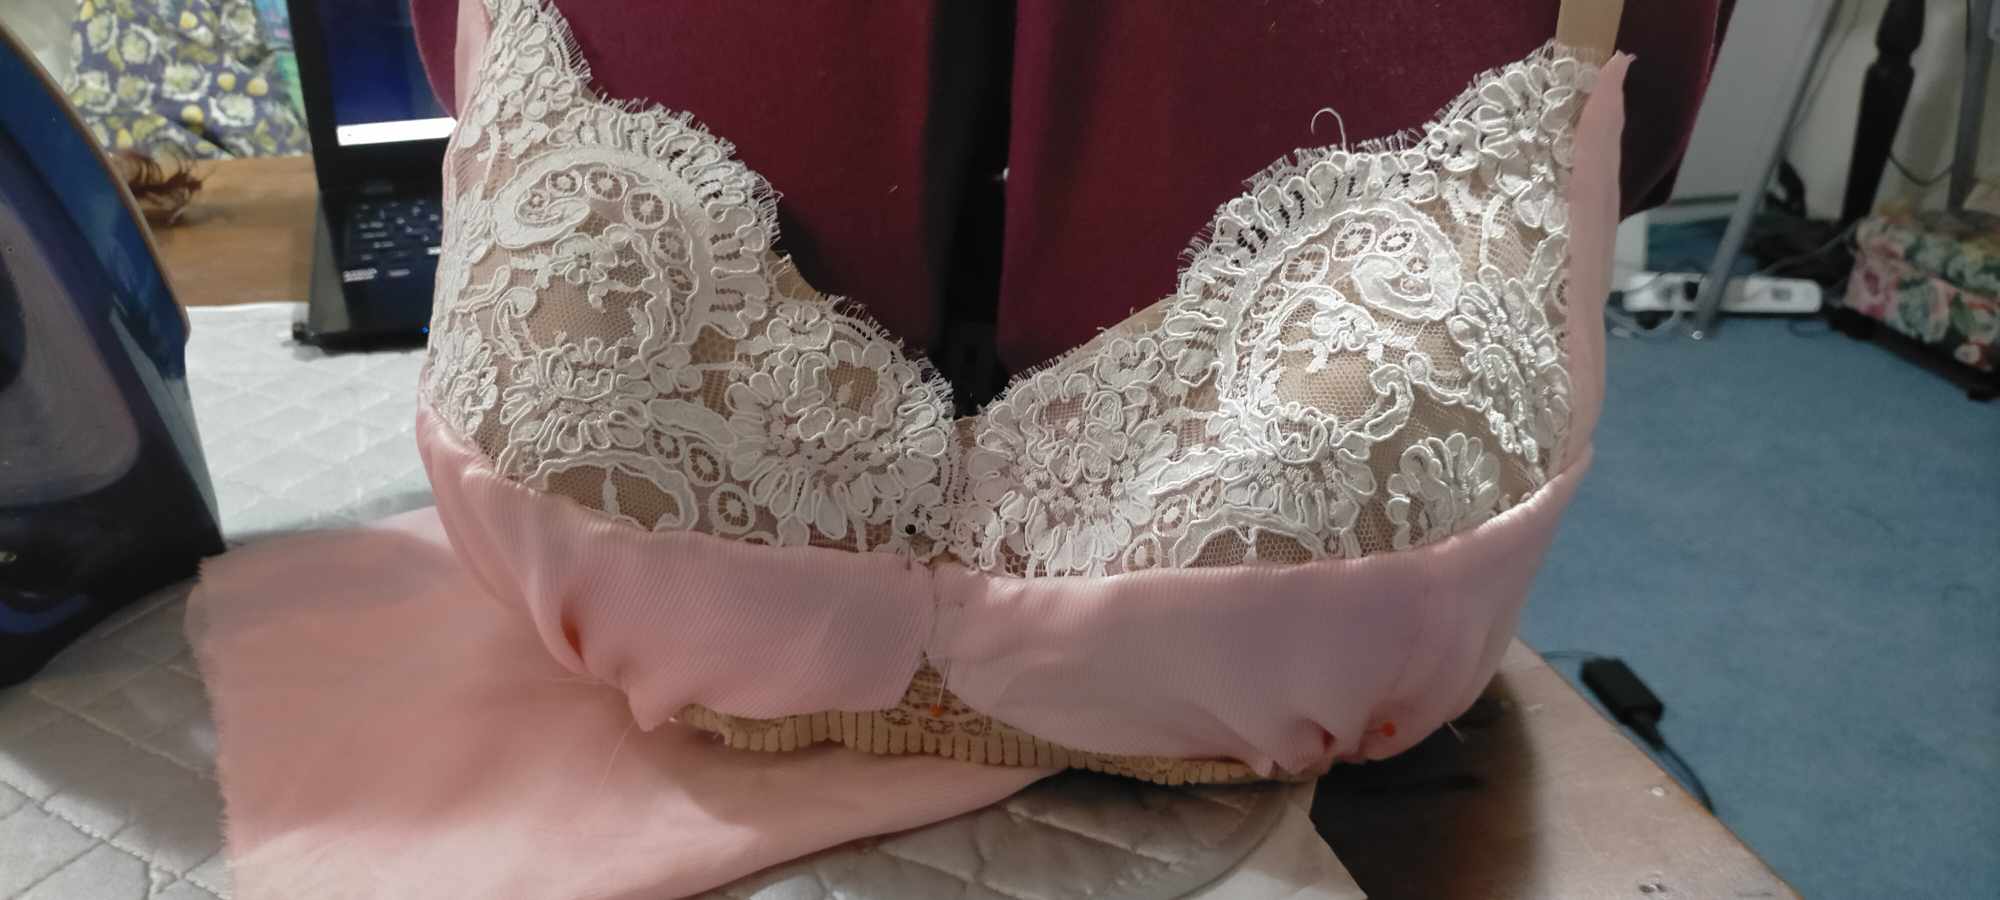
Set in the Channel Islands during WW2 occupation, Gabriel the play needed a period credible brassiere. Trouble is, the wearer would have worn a binder style bra, not the dainty peach and lace ones we love to think of, so I decided stuff it, and built a pretty one on top of a modern skin tone bra.

For the 4 seconds it is on display, I think it would have gotten the idea across. Lightweight silk I overdyed with food colouring as it was a bit wishy washy, and chantilly lace from my stash also dyed with food gels.

 Persuasion

Persuasion just closed after a sell out season. A mammoth effort that was costumed from scratch. I was asked to make a bicorne,and  also ended up making a second, not shown.


This is made from a black $12 sombrero - I reduced the crown down, steamed it into shape, covered it in felt using Steamaseam, bound it with black bias then glued on authentic metallic trims. The metallic trim is too heavy for a machine and I knew the stitches would be super obvious from the back row. And no way was I sewing this on through all that nasty synthetic.

So, it turns out my lovely friend Janet was also cast in it and so I undertook to make her overcostume too. She doubled as Lady Russell and Mrs Musgrove. The show wasn't trying to be super authentic, but it definitely captured the vibe, I feel. Sadly my pleas to incorporate shawls and bonnets weren't taken up due to the seamless style of it all, no time for transitions - but I DID get headwear onto my friend.

The only thing I made in this image is the cap Janet is wearing (second from right) but don't you love the puppets for the annoying Musgrove Children! The rest were made by a local lady who is incredibly clever, and had a month to do nothing else. The things people do for community theatre...Anyway cap made from self stripe silk organza and a couple of other laces. The Dreamstress donated some lacy offcuts for this, thank you as always!


Funny, Janet is in the same position in this pic as the last, but this time as Lady Russell. I made her red overdress and turban. The fabrics are velvet and a heavy Indian cotton with metallic crewel embroidery. Everything Janet wore has come back to me and that dress is going to become a jacket at some stage!

And that's my foray into theatre costuming! I did assist with another professional production but I'm not spilling the beans on that one!


Friday, October 26, 2018

Brighton, I HEART you, and corsetry!

I am skipping across what happened between leaving Auckland and arriving in Brighton on the south coast of England. Short version: binge watching TV, officious airport staff, insomnia, tube stations and suitcases, kittens, trains.
And here I am in Brighton! What a place, it speaks directly to my heart as a Wellingtonian, but added value is AMAZING architecture everywhere. These are all from the street I stayed on my first night here.


I was laughing with my lovely friend Hester who lives here, how our kiwi eyes see so many details and think, how can that be allowed, it would kill someone in a quake! and then realise, no chance of that happening!
So far I have been on a tour of the pier, water front and some of the town, stocked up at Boots, drunk lots of good coffee, and finally slept for a few hours. Oh, and I had the most exciting experience that I could have, being me. Some of you will appreciate this!
I stayed in an AirBnB on the street shown, and my landlady mentioned in passing that a corsetry business was over the road, in a perfectly unassuming house! This business is Axfords and I was over there knocking on the door asking to chat to Michael the owner in two minutes.
 Michael was happy to talk to me, and the more I saw the more I was blown away. These guys make their own spiral boning, have coutil and cotton/viscose satin and other fabrics woven for them - they've been at it 125 years and in the cutting room (photo) I got to touch and coo and the quality of the garments is fantastic.
I love that this company started in 1880 making utility garments really, at a time when most women would be wearing a corset of some kind. And right through until corsetry evolved into a specific kind of garment for much more niche purposes. Michael says they make corsets for the theatre and TV, and the current production of Rocky Horror.They have three manufacturing locations as Brighton is a place where you have to work around the buildings not vice versa. Their HQ is 82 Centurion Road, where I found them, however...
...this is the other side of the house which is built into the hill so it appears a lot bigger from New Dorset Street that runs behind. The garment construction and boning making happen in two other buildings around the town. There's a big A bricked into the gable that you may be able to make out in the photo - this building was built for Axfords, pretty impressive.
Every corset is made from start to finish by the same corsetiere. Those of us who sew will appreciate what a difference this makes to the quality of the garment. There's as much engineering as sewing in a corset and controlling this is a big part of the quality and durability of the resulting garment.
And can I say that the cutting room smelled like it should? Like an Atelier should. Just magical.
Thank you Michael for letting this random kiwi fizzing with excitement and spouting nonsense in her tired state, into your business and talking to her. I couldn't think of a more fun thing to do - beats the Pier hands down!


Saturday, September 1, 2018

How to Rhinestone

This is the costume I've been working on forever. Today I started the back of the skirt
I refer to rhinestoning as just stoning, and given the need to heat things in spoons on elements and little plastic baggies, frankly the whole set up is a bit Stoner!

This is how I do it. It works really, really well, does not involve toxic glues and doesn't take very long. I took photos as I went, hopefully these will illuminate the process!
You need:
My menu of rhinestones - AB Rosaline and AB Rose, AB Peridot, Peridot and Emerald. These wee baggies are worth nearly as much as I imagine they would be if they contained an illicit substance ;-) These are from www.rhinestonz.co.nz
  • Something to Rhinestone (my robe as shown above)
  • Flatback rhinestones - I use Arabesques because I am a cheapskate - they are fifth of the price of Swarovskis and not quite as good, but on this costume it's all about the quantity. 
  • Beeswax
  • A wooden skewer
  • A teaspoon with a heatproof handle
  • Aleene's Tacky Glue - it is by far the best glue as it holds its shape really well and dries fast. For stretch fabrics or things you will need to wash, use Aleene's Flexible and Stretchable, which isn't quite as thick but holds a blob well.
  • Silicone baking paper - pretty much essential for thin fabrics or areas like sleeves where you have to have one layer of a costume over the other.
  • PATIENCE
 To make an applicator stick, first cut a sliver off a block of beeswax. Pop this into the bowl of the teaspoon and put on an element to soften/melt.
 You only need a little bit of beeswax for this - you can use the rest for sniffing!
 When it is soft enough to mash up with the end of the skewer, gather up some and form a  knob of it on the skewer end. Let it get a bit firmer before using.
 I am starting with the dark green stones. I tip enough to do the job onto a lid, so I can move them around easily while working.
 While my beeswax is cooling, I turned all of the stones up this way.
I spread the gown on the kitchen bench return, over a layer of the silicon paper.
 Now squeeze out wee blobs of the glue where you want the stones to go. With these deep green stones, I am working on the darkest branches of foliage in the pattern.
See how many blobs I can do in advance! You can do more than this too. The glue stays wet for plenty of time, though I wouldn't wander off halfway through to take a long phone call. I use the wax stick to gently catch the top of a rhinestone and transfer it to a blob of glue. Gently press it in.
  This is the whole branch completed. See all that white glue showing? It's a good thing! It dries clear but the ring of glue means the stone is held well in place.
This shows the second round of stoning - once I completed the first branch (top of pic) I then glued up two more.
Here's the finished area after I've gone over it again with the other colours of stones. Because this is the back, I've been pretty light-handed - the fronts have about three times as many stones. But I have found the hard way that backs of costumes get a hard time with sitting etc, so this is just about it not being obviously not done!

Top tips:
  • Your beeswax applicator my get less effective if it is cold.  I use my fingers to soften it back up again. Remember you need only the lightest pressure to lift the stone and transfer. It should release, really easily as a result.
  •  Aleene's dries enough to peel the fabric off the paper in about an hour. Gently peel it off - it will be stuck but it will still lift. It is not dry enough to wear until at least the next day but preferably a good week of curing is best. But with a huge job like this neverending robe, I need to shift the completed stuff so I can do the next section
  • Of course you can follow a pattern - I do this too but it is far easier to follow the pattern of a piece of lace, a print or a brocade design. Same principles apply.
  • If you can't find non-hot fix in your colour, get the hot fix ones and stick them on this way. It's no biggie.
  • ALWAYS stretch out garments that are worn stretched, before you do them. 
  • ALWAYS use a thick, tacky glue like Aleenes - if you are working on a foam cup bra or some other surface that is not flat, it won't dribble down the slope like GemTac or Tiger Grip. Not all PVA based glues are the same!
Good luck and let me know how it goes!


Saturday, January 27, 2018

Courage vs Confidence

People are always admiring my confidence, because I will do mad stuff like this photoshoot in undies. The thing is, it doesn't work like that, I'm sharing this not to blow my own trumpet, but because I think it might help people who are scared of giving these things a go to understand how it works:

I do it because I am scared, but I screw up my courage and have a go. The confidence comes FROM this, it is not the beginning of the cycle. Experience has taught me that this will mostly happen, although sometimes the outcome is awful and humiliating and terrible, just as I fear it may be. But I live through it and have another go.
ANYHOO! THIS photoshoot is to publicise our show at Art Deco Weekend in Napier; KABARETT presents NacktMusik 
 This is a thrown together look that I am improving on for the show. YES, I am in a bra and cami knickers and I will be on stage. This is a really terrible idea in many ways but I'm doing it anyway. It is a terrible idea because in spite of knowing it is perfect for my character, some people will be very judgy about it.
 Especially when I am surrounded by these babes all evening! Spending a day with them all being so gorgeous in their scanties for this shoot was nerve-wracking, even though we all love each other and it is a very safe space full of trust and mutual respect.
 There's nothing typically sexy or titillating about this.
But, we will have fun and it all makes sense. Clever Hansel and I are married in this show. A somewhat unconventional relationship that is probably not a legal marriage, given my character's actual assigned gender is probably not the one I am identifying with here.

It is a Cabaret of weird, sexy and unexpected acts, tied loosely together by snippets of insight into the lives of the cast - their loves, losses, addictions and confusions.
I could have taken an easier path with this show and worn more clothes. When I first started performing, I would no more have done this than run naked down the street. But, the courage-action-confidence cycle has moved me a long way from then, and I hope that this show will be one of the wins. I am sure it will, actually, as it is something special.

Saturday, January 20, 2018

Bra Busting!

People when you are my size, bras with stage appeal are non-existent.
But, I can sew! So recently in Christchurch when I had some time for once, I found this bra.
The stripy sheer fabric has a good Art Deco vibe. However, it lacks the slapper-like qualities needed for the character I am portraying. So, I hacked it!
Modesty forgoes an in situ photo of the process but basically I put it on and attacked it with the scissors, much like the red line, without cutting through the elastic and lace edging. I also cut away the black net lining so it is more transparent. Then I laid the edging back over the newly cut line and zig zagged it. It wasn't long enough but it doesn't matter as I then added a heavy lace strip along the top to hide it all. This is all for stage so the fairly rough approach is fine.


 I felt it needed some bling so I hauled out a sieve from the kitchen to act as a 3D mold to keep its shape.

 One sieve, one bra cup and off we go!
I could only do one cup at a time to let the glue dry (Aleene's Tacky is the best thing for sticking on rhinestones ever)

I haven't covered the whole cup as I just want to add some sparkle. The stones are black diamond so low contrast.
When it's all dry tomorrow I can try it on and decide if it needs anything else.
The photos are all at night so a bit rubbish. But not as rubbish as unpicking black lingerie was!
I bought this corset on half price sale and it fits perfectly in the front, just not enough to wrap all around moi, so I've unpicked the fastenings from down the back in order to add an extra panel of black power net on each side.
Jeepers all this naughty gear is a bit confronting. I'm not sure if I will be wearing ANY of it on stage as yet, but if I do it will be in a humorous context. :)

Wednesday, January 17, 2018

The Fastest Costume ever!

Tonight I went upstairs to alter a bra for a show and as I was fossicking around looking for some sequins, I grabbed what I thought was a bit of trim in a pile and pulled out a dress!
Yes, this is an insight into the chaos of my studio!
Amanduh La owns the dress, I think, and I think we were going to alter it to fit her as it is a bit big, but it was so utterly perfect for my next big show, I set about embellishing it.
My go-to was a length of hideous 50cm long ombre fringing. I mean really, what WAS I thinking when I bought it?? I originally attached it to a mini skirt to wear with the outfit below when Polly filla and I did Queen vs Queen. But I couldn't do it.
 Me NOT wearing hideous fringing skirt because...
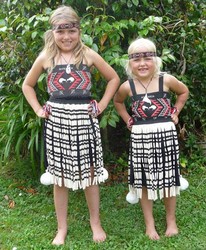
 ...it looked like a Kapa Haka skirt, as shown on these two poppets. Cultural appropriation much??

Also, I hate associating fringing with the 20s as it really wasn't a thing, contrary to millions of costumes that say otherwise. But, also I couldn't resist putting black and white with black and white.
Here we go! The big white butterflies are in my stash and just give it a bit of extra lift. LOL
The dress is SO itchy as the sequins rub though the very thin lining and trying it on nearly drove me demented. But I will have slippery things on under it so it will be ok. I NEED to wear some shapewear with it as it is a very firm fit indeed.
I think once I'm done with it I will give it back to Amanduh. But don't tell her I'm borrowing it!
That's Amanduh over my left shoulder. Oops i'm wearing one of her costumes here too! But she does borrow mine quite often... ;-)